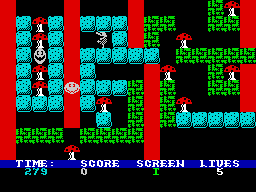
ROCKMAN
Mastertronic
Meet Rockman — an underevolved little Troglodyte who likes a
good gobble! (Fnar!) And he likes nothing more than gobbling mushrooms, and
lots of them. The mushrooms proliferate throughout the network of caves that
Rockman lives in — a pretty idyllic lifestyle, all things considered, except
for the smiling faces. Though of a jolly grimace, these vaguely intelligent
spritettes spell death for Trog if they touch him. After all, smiling faces
have to eat too, and they don’t like mushrooms, so Troglodytes have to do as
munchies for the faces.
No death-o-zap laser gun for Rocky, because living in the Stone Age all that
has been invented is the hammer. Bashing any of the rocks with his mallet
causes them to instantly crumble or fall to the ground, depending on what is
beneath. If Troglodyte eats all the Mushrooms on one screen, he’s instantly
transported onto the next screen where another feast of mushrooms is laid
before him, which he just has to eat.
With spritely vigour he can run along, and drop off, the ledges of rocks
that make up the majority of the maze. Also part of the cave interior are the
vertical red zoom tubes, which allow him to scamper up and down between
levels.
Though some people like to take time over their lunch, Rockman doesn’t, and
actually needs to consume all the mushrooms on screen within a time limit.
Rockman features 20 levels, and after completing five you’re given a
password. So, when you begin a new game, you input the password and skip the
five levels. Five lives are given to Rockman to stuff himself silly, one being
lost for every ill encounter with a cave nasty.
ROCK AND (CONT) ROL
Rockman is controlled by the user-defined keys or Kempston,
Cursor or Sinclair joysticks. And to get you started, here are four clues to
the four four-letter passwords. If you can solve the clue, you’ll know the
passwords!
- A gemstone with black and white bands
- A Hindu or Sikh religious leader
- A Herb with grey/green leaves and purple, white or blue flowers, could also
be a wise old man
- A slender, sharp, curved nail on an animal’s toe
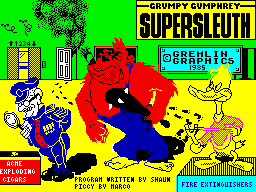
GRUMPY GUMPHREY SUPER SLEUTH
Gremlin Graphics
‘Are you free, Mr Gumphrey?’ I’m free!! Welcome to Mole Bros
Department Store, a store of huge proportions, and in which Grumpy Gumphrey:
SuperSleuth works.
Poor old Grumpy Gumphrey is definitely the department store’s dogsbody.
Apart from the fact that he is supposed to be guarding the shop’s stock from
marauding thieves (he is the Store Detective after all), Grumpy is also set a
whole variety of tasks by the mean and moody manager. In between shooting mad,
rampant ducks on the ground floor, Grumps has to make tea for his ungrateful
boss and cope with a whole host of minor and major emergencies in the
store.
GRUMPY’S CONTROLS
Keys are:
- Q : Left
- W : Right
- P : Up
- L : Down
- Space : Fire
- D : Drop / Pick up
- T : Re-read message
- S : Scroll objects
Alternatively Sinclair and Kempston joysticks can be used.
Each task has to be completed within a time limit — gametime is relentlessly
ticked off by a digital display at the foot of the screen. Failure to complete
a task in time, results in a summons from the manager. Once summoned, Grumpy
has to make his way to the Manager’s Office within half an hour to receive a
warning letter. If he fails to arrive in time, he gets the boot.
The store is crowded with shoppers (and the odd toy soldier), who mill
around, manically getting in Grumpy’s way as he tries to complete his tasks.
If any of the characters other than the harmless hippy bump into him, Grumpy is
pushed about and may be knocked off his feet — in which case he sits down.While
he is sitting down, Grumpy gets closer to his next warning letter.
A bar at the bottom of the screen indicates how close Grumpy is to his next
warning — as it gets shorter another missive gets closer. Four letters, and
he’s out of a job.
A horizontal message area at the bottom of the screen displays the latest
order from on high and is used to remind Grumpy of the next task he needs to
complete in order to survive the day.
There’s a variety of objects scattered throughout the store which can be
used to help Grumpy in his chores. To pick up an object, Grumpy has to be moved
up to it and the pick up key pressed, whereupon the object is transferred to
his pocket — area at the bottom right of the screen. Once an object has picked
up it can be dropped, or knocked out of Grumpy’s hands by jostling
shoppers.
And for all budding Sleuths out there, here are some tips to get you
started: You can get the tea cup in the canteen by collecting the box and
putting it in front of the table where the tea is. Then walk forward (ie: up)
onto the box to pick the tea up. If you find the skateboard, Grumpy can use it
to get around the store faster.
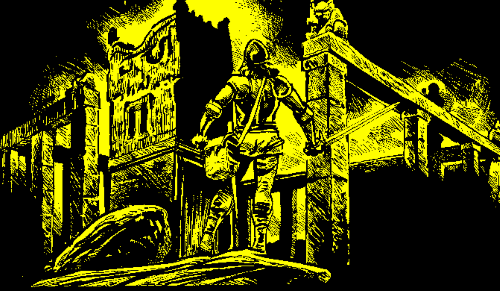
Adventure Challenge! The Ket Trilogy Part 2
TEMPLE OF VRAN
Curse fate! Blast the man who framed you with a murder you never
committed! And above all may hell swallow Bran Verusbel and Delphia (although
that’s your job...)!
If they didn’t send their armies into the lands of Ket, killing and
plundering, you wouldn’t be on this mission. Mind you, the executioner would
have got you. Undertaking this mission to kill the Priest King Vran and his
High Priestess Delphia is the only hope of life the Lords of Ket have offered,
so you volunteered. They don’t entirely trust you though, do they — why else
attach an assassin bug with poison fangs on your neck? Yes, little Edgar is
going to make sure you remain the hero. He’s been quite helpful too, full of
information on all you’ve met and more.
Exhausted, you’ve made it to the far side of the Mountains of Ket. You’re
weighed down by all you’ve collected on the way: a suit of armour, sword, and a
magical ring. Passing the final guardian, that huge Zombie would have been
impossible without them, and the wand of course. But that’s gone. Just as you
were making that last dash towards the chink of daylight and freedom, the
Zombie snatched it, and rolled a huge boulder into the tunnel behind you. No
way back...
TEMPLE OF VRAN
Your mission now is to reach the Temple. Once there you will
hopefully succeed in destroying its evil occupants. You’ve been told the Temple
is found somewhere to the east, although probably not on a direct route. Again,
many items you come across on your travels should be of help. Better not waste
any, or bitter regrets will follow. But then, you know that already...
PLAYING THE ADVENTURE
When entering commands use a Verb/Noun combination. You’ll be
told if your command is not understood, or if you’re trying something
impossible. Here are a few sample commands: Get sword, prepare sword, throw
cane, climb down, go east. Additional special commands:
- Inventory: Lists objects you have with you and shows your
prepared weapon.
- Stat: shows your current condition.
- Score: how well are you doing?
- Beep: turns off the Speccy keyboard beep.
- Help: May be useful.
- Look: redescribes your present location.
- Quit: ends the game.
Commands may be abbreviated: Inv: Inventory, N: North, U: Up, etc..
Your statistics measure your current condition: Prowess, Energy and Luck.
These are used in combat. You’ll be told your statistics at the beginning of
the adventure, and they may be checked at any time using Stat. The higher the
better...
HOW TO FIGHT
To enter combat you must have a prepared weapon. Find out by
typing Inv. If you have, one of your weapons will be inverse video, this is
your prepared weapon. To change weapon type Prepare XXX (whatever weapon you
want).
If you get into a fight a special combat screen will be displayed. It shows
your abilities and (thanks to Edgar) those of your foe. Combat is split into
a number of different rounds, ending when one of you dies or flees. Each round
your prowess and that of your opponent is compared. The higher of the two has
more chance of hitting your opponent, but even low prowess may hit! A hit
decreases the opponent’s energy, and total loss of it means death. You get a
chance to dodge, but Luck is needed. Don’t let it run out!
SAVING AND LOADING
You may save your present position at any time to continue
later. Enter SAVE, type in a filename and start record. Press a key and the
game will save in two short parts. To LOAD a previously saved position, LOAD
the main program, type LOAD (enter), then play your data tape. You’ll be told
when loading is complete, and off you go from where you were!
PLAYING THE TRILOGY AS A WHOLE
Although you can play each part separately, there is the added
thrill of solving the quest as a whole. Complete part one, then simply insert
the next tape into your player and press play. The computer will preserve your
current condition to take with you into this next part.
HINTS
Don’t leave anything useful in a different time zone — you may
not be able to return! Draw a map as you go.
SCEPTRE OF BAGDAD
from Atlantis Software
Ah, those Arabian Nights, eh? Genies, flying carpets, silly
pointy slippers and other Turkish delights; you’ll find them all in this
amazing cartoon arcade adventure from Atlantis.
Sultan Caliph is having a spot of bother. On the first day of each year he
must wave the ‘Sceptre of Bagdad’ at the local peasants to remind them he’s the
boss, and anyone who disagrees gets their head lopped off.
However, this year the Caliph has woken early, feeling decidedly strange.
After a quick bodily perusal he discovers that he has shrunk to tiny
proportions. Desperately, he climbs from his bed and clambers up to the Magic
Lamp sifting upon his dressing table, and consults the Genie.
Genie tells Caliph that he’s the victim of a spell, cast by a wicked wizard.
The Caliph’s home has now been turned into a puzzlesome palace of shark
infested rivers, burning deserts and seemingly impenetrable barriers.
The Sceptre is at the far end of the palace, and if it is not reached within
the ordained time the Caliph’s reign will come to a premature end.
The corpulent ruler can move left and right, jump upwards and pass through
doors and other entrances. Objects found en route are collected by simply
walking over them. Only two objects can be carried at once, the last acquired
being displayed at the bottom of the screen. An inventory of items carried is
accessed by pressing the space bar.
Sections of the palace and its grounds can only be crossed if the Caliph is
in possession of certain objects — the coconut is needed to cross the desert,
but the sling and pearl are first required to get the coconut!
If all of this wasn’t bad enough, the poor Caliph finds that his palace has
been infested by vicious creatures and monsters. Should these beasts touch
him, the podgy ruler’s life force is diminished until he eventually loses one
of his three lives.
A reincarnation potion is hidden in the palace, saving the player’s position
when drunk. This position can then be returned to by selecting the ‘Old Game’
option on the main menu.
CALIPH’S CONTROLS
Keyboard controls are definable; you need left, right, up,
down, and a select key. If you’re happier waggling a stick of Bagdad then
you’ll need a Kempston, Cursor, or Sinclair.
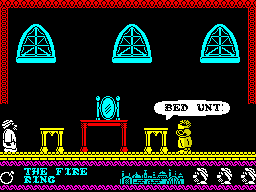
DELIGHTFUL TURKISH TIPS
This should get you approximately one quarter through the
game. Nick will print further tips in future issues. Won’t you Nick?
First of all, take the FLUTE and leave the HANKY in the starting room, then
keep going left until you reach the Air Bagdad platform. Jump onto this to fly
across the river. Then go to the tower, enter, walk to the pile of rope to go
up. Go right and jump up to the bird which ends up in a nest. Leave the FLUTE,
pick up the WINGS and jump up across the nest until you are on top of a
balcony. Keep on walking and allow the bee’s nest to fall. TI bee does not harm
you.
You should now have a MINERS HAT AND SEVERAL WINGS. Take the WINGS across
the river and go left until you get to a statue of an archer. Jump up the steps
until the statue flies off. Return over the river to pick up the KEYS and
leave the WINGS there. Take the MINERS HAT to the room with the BEACHBALL and
KEYS.
Jump up the stairs and turn right. When you’re inside, walk right and keep
on going right to get rid of the nagging lady and to open the wardrobe. Slide
down the banister, jump on the table and grab the ALI-BABA BOOK. Go back up
the stairs and grab the FIRE RING, leaving either the HAT or the KEYS. Don’t
drop the BOOK. Go left, press the key used for going through doors, slide down
the banister again, go left to Air Bagdad, fly to the other side, go where the
statue used be and jump to the top.