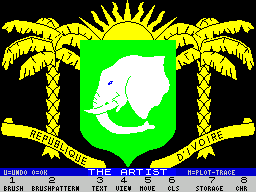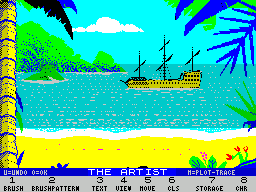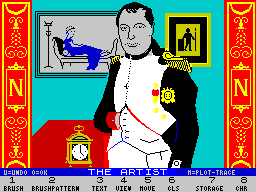
Even after 3 Spectrum seasons graphic utilities are still sprouting up fast from the fertile software vegetable patch. Every home-grower is vying for the biggest and juiciest product and this cannot be easy with existing ‘veg’ such as Leonardo. Softek have taken the challenge and have created ‘the most powerful and flexible graphics program for the Spectrum’ yet. Powerful words no doubt, but if this is true, SofTechnics, which is a division of Softek International Ltd, has given The Edge the edge over its competition in the creation of interesting graphics for its excellent games software. By releasing it to the general public, the powerful tool, which is aptly named The Artist is going to provide anybody with the same firing, I beg your pardon, drawing power...

After displaying the intriguing loading screen (Thank God the human hand has got the upper hand), which incidentally I was told was put to screen within a couple of hours with the help of — you guessed it — The Artist, the program displays a not very unfamiliar main ‘work screen’ with a row of command options at the bottom. In actual fact, there are 3 main command menus serially accessible by pressing the symbol shift key. Cursor movement is manual with the use of the Q and S keys for up/down and A and I keys for left/right movement and their combinations for any diagonal movement. A joystick may be used with the addition of a Kempston interface. The speed of the cursor movement is governed by the length of time the keys are held down. This facilitates fine detail work, with the initial slow speed, and obviates the need to pre-select speeds. The major pen/brush controls are C for setting pixels, X for deleting them and Z for setting the attributes.
The main menu features such interesting options as Brush, Brush pattern, Text, View, Move, Cls, Storage and Chr and these can be explored in turn.
Brush selects the brush in action, which can vary in thickness from 1 to 8, can be a quill providing variable brush width or can be an airbrush, which in combination with the eight airbrush widths can be used to spray the screen for shading and blending.
Brush pattern selects one of the ten patterns available with which the screen may be painted. Here again, the brush size may be varied for best results. The cursor changes size and shape to indicate the current choice.
Text is the typewriter mode which provides a text-writing related menu on selection. This includes options such as inverted or normal and ‘Over’ text together with the more mundane functions Capslock and Extended. An interesting feature is the selection of the inbuilt small character set, which provides at the touch of a button a 64 column text display. There is also the choice of selecting up to 8 different character sets, which can be defined using the inbuilt Character Graphics Generator. These can be viewed in text mode for easy recognition.
View eliminates the function menu at the bottom of the screen and gives a full view of the entire screen area for full screen designs. Pressing any other key will bring back the main menu.
Move is an alternative to the View function in that it displays the lower three menu-hidden lines by scrolling the entire screen up three lines. This allows work to be done on the lower lines, which are normally hidden by the menu.
CLS clears the screen, but only after confirmation has been given thus reducing the risk of any artistic suicide attempts.
Storage deals with the saving and loading of data and pictures and to this purpose a new menu appears. Here will be found the Copy function, which copies the current screen to the ZX-printer. Save and load functions are provided for tape, wafadrive and microdrive systems with the option of storing or retrieving character sets, screens and user graphics. To control the wafadrive/microdrive operation, there is a CAT (Catalogue) and an Erase facility and for the wafadrive specifically a Flip Default Drive, which switches between A and B drives.


The second ‘Main Menu’ deals with the graphics generation and includes several innovative features.
Line deals with line drawing, and three different techniques may be used which all require a main cursor and a reference cursor. Plot-Point mode retains a fixed reference cursor and when the main cursor is moved, all lines will originate from this fixed point. Plot-Move slaves the reference cursor to the main cursor and if the main cursor is moved, the reference cursor will move in parallel. The lines drawn will therefore always be in parallel. The most commonly used mode will be the Plot-Trace mode, which automatically repositions the reference cursor to the last main cursor position when a Line command is executed. This mode is used for outline drawings. The reference cursor can be repositioned at all times by setting the main cursor to the required position and pressing Space.
Circle is a straightforward circle generator. The reference cursor is used to set the circle’s centre and the main cursor defines the radius by indicating a point on the circumference. This is a far more useful method than the normal Spectrum circle function, where the radius must be given as a parameter. Box draws boxes or frames indicated by the diagonal position of the two cursors.
Arc draws arcs provisionally between the two cursor positions, and six keys with progressive action may be used to curve the arc in both directions. When the right curvature is achieved, the arc may be accepted by pressing the P key.
Fill is an extremely fast fill function with the added advantage of filling not only in black but in any pattern, which can either be one of the 10 inbuilt patterns or any selfcreated pattern. These can be selected in the pattern choice mode.
Over and Invert affect the four drawing commands and are self-explanatory.
Pattern provides a chequer pattern of bright and normal character squares for determining where the attribute boundaries are.
Enlarge blows up the area of the screen currently being worked on and indicated by the main cursor. All draw commands are available in this mode and the display area moves automatically across the entire screen area.
Undo lastly provides help should anything have gone wrong during the events of the creation. U undoes a command and 0 will protect all commands up to this point from being undone. 0 for Okay actually acts as a pointer to the Artist as to how far back the Undo command should be effective, The Undo command is extremely effective as it can undo one command after another, in fact a whole string of commands up to the last okayed entry. This provides an easy experimenting facility with different shading, colouring, shapes etc. Automatic okays occur whenever a fill is done, or after entering the text mode and when leaving the Overlay mode. Undo can also undo itself, so if the work has accidentally been undone, it can be retrieved with an Undo command.
Overlay provides the most ingenious feature to the screen artist. This mode allows any area of the existing screen picture to be lifted, transformed with the use of various functions, moved and refitted into the screen picture in different ways. The execution is straightforward. After selecting the Overlay mode, the boundaries of the picture segment to be lifted can be drawn with the use of the Plot-Trace mode. Ensuring that the main cursor is positioned within this closed shape, the 0 key will fill in the shape with black. By pressing the overlay key (3) again, the overlapping section will be cut out and lifted out of the screen. At this stage there is the choice of removing the picture, ie. cutting it out, or of only making a transportable copy of it without destroying the original area. The transportable copy may now be manipulated with various functions such as Invert, Mirroring (left/right or up/down) or scaling (up or down in ten different increments). When positioning the copy, it can be viewed in its new place provisionally before committing to the screen and the chequer pattern may be energised for the correct positioning in relation to attribute boundaries. Dropping the copy into the screen can be done using XOR (blending), Or (superimposing) or EXCLUSIV (destroying the existing picture information) logic. Several copies of the shape may be dropped onto the screen.
The possibilities are enormous with the Overlay mode, and several functions found in other graphic packages can be reproduced quite easily. Ellipses for example can quite easily be drawn in overlay mode with the use of the scaling option. Shading of existing drawings can be accomplished with the overlay method. In fact the user’s imagination will probably set the limit to the applications.
The last main menu deals with the colouring of drawings and provides access to the colour, brightness and flash attributes of the screen. Colouring technique is equivalent to the Spectrum Basic options. Entering the menu however will immediately display a window with the two cursors defining the size and position. The colour changes will be confined to the window area. Paper, Ink, Bright and Flash can be selected and executed within this frame. The border colour can also be chosen, but as it is not part of the screen will have to be set later in the user’s program.
Going back to the first main menu, the selection of CHR leads into the Character and User Defined Graphics Creation sector. Up to seven character sets may be redefined. The screen displays a grid of nine large character squares and each of these is split up into 64 bit squares. On the left of the screen is displayed the menu function and above it the original sized block of nine characters that can be worked on (the USR square). Above this there are a further 4 such squares alternately coloured green and cyan. Creating and storing characters is quite easy. After having drawn the new characters on the enlarged grid using the available drawing functions, the character set mode is selected. The selected set number is displayed in the top left corner and the USR box with the new characters remains on display. The characters in the selected set are displayed and arranged in columns and rows numbered for easy reference.
The different sets may be selected by pressing the ‘C’ key and entering the set number. Saving is accomplished by pressing key ‘S’ and entering start line and start column with a further indication of the quantity of characters to be stored. Loading is performed similarly. Set 0 is the original Spectrum character set and although no new characters may be saved in it, the existing characters may be loaded into the USR block. The program even allows characters to be grabbed from the main screen into the USR block by pressing key ‘K’ . A green 9 character square will appear and this can be moved around over the area of interest and grabbed with key ‘X’. This feature allows the creation of characters larger than 3 x 3 with the help of the enlarge feature on the main screen. Once stored (in groups of 9 character squares) they may be recalled onto the main screen.
The creation of the new USR characters is accomplished using the same keys for cursor movement and pixel setting as with the main screen. An addition is the ‘Z’ key which will clear entire rows within a given character cell. Three mirror options are provided (mirroring single character cell, mirroring the leftmost six characters and mirroring all 9 characters), similarily three Turn facilities are provided, which will turn each character (or block of four or block of nine) around its axis by 90 degrees, and an Invert command.
Apart from the usual CLS (Clear grid) and Undo command, there is a powerful move option, which moves the entire contents of the grid, pixel by pixel, in any direction. The four coloured 9 character blocks provide a facility to store and animate related sprite graphics. Print and Load Block provides the transfer between the USR block and these four. Animate Four will animate the sprite by printing in rapid succession the four blocks in the USR square. There is even the possibility of animating six successive characters with Animate Six using the entire character set.
SofTechnics provide a Screen Compressor with the package which can be loaded separately from side 2 of the tape. The program allows several screens to be stored or thirds or two thirds of screens, giving each a number and then allowing pictures to be recalled upon selection of their number. The program has a menu which provides the choice of loading a screen, viewing it, deleting the last screen or saving the finished block of screens. The compressed block of graphics can be loaded into the required memory area and recalled with a short Basic program. The compression technique is based on a complex pattern search and detect system and the effectiveness depends on the complexity of the given screen. Typically. it will compress a screen to between a third and a half of its normal size. The compression of screen-thirds provides the possibility of writing simple but effective graphic adventures in Basic.
Program: The Artist
Producer: SofTechnics — Softek
Price: £12.95